Skip to product information
1 of 8

Electronic Boutique

Freeboss 48V Phantom Power Repaeat Effect USB Function Bluetooth Karaoke DJ Console 99 DSP Mixer Audio 6 Channel ADM-GBR6

Freeboss 48V Phantom Power Repaeat Effect USB Function Bluetooth Karaoke DJ Console 99 DSP Mixer Audio 6 Channel ADM-GBR6

Regular price $445.60 USD
Regular price $668.40 USD Sale price $445.60 USD
Sale Sold out
Taxes included. Shipping calculated at checkout.
Color
Ships From


ADM-GBR6

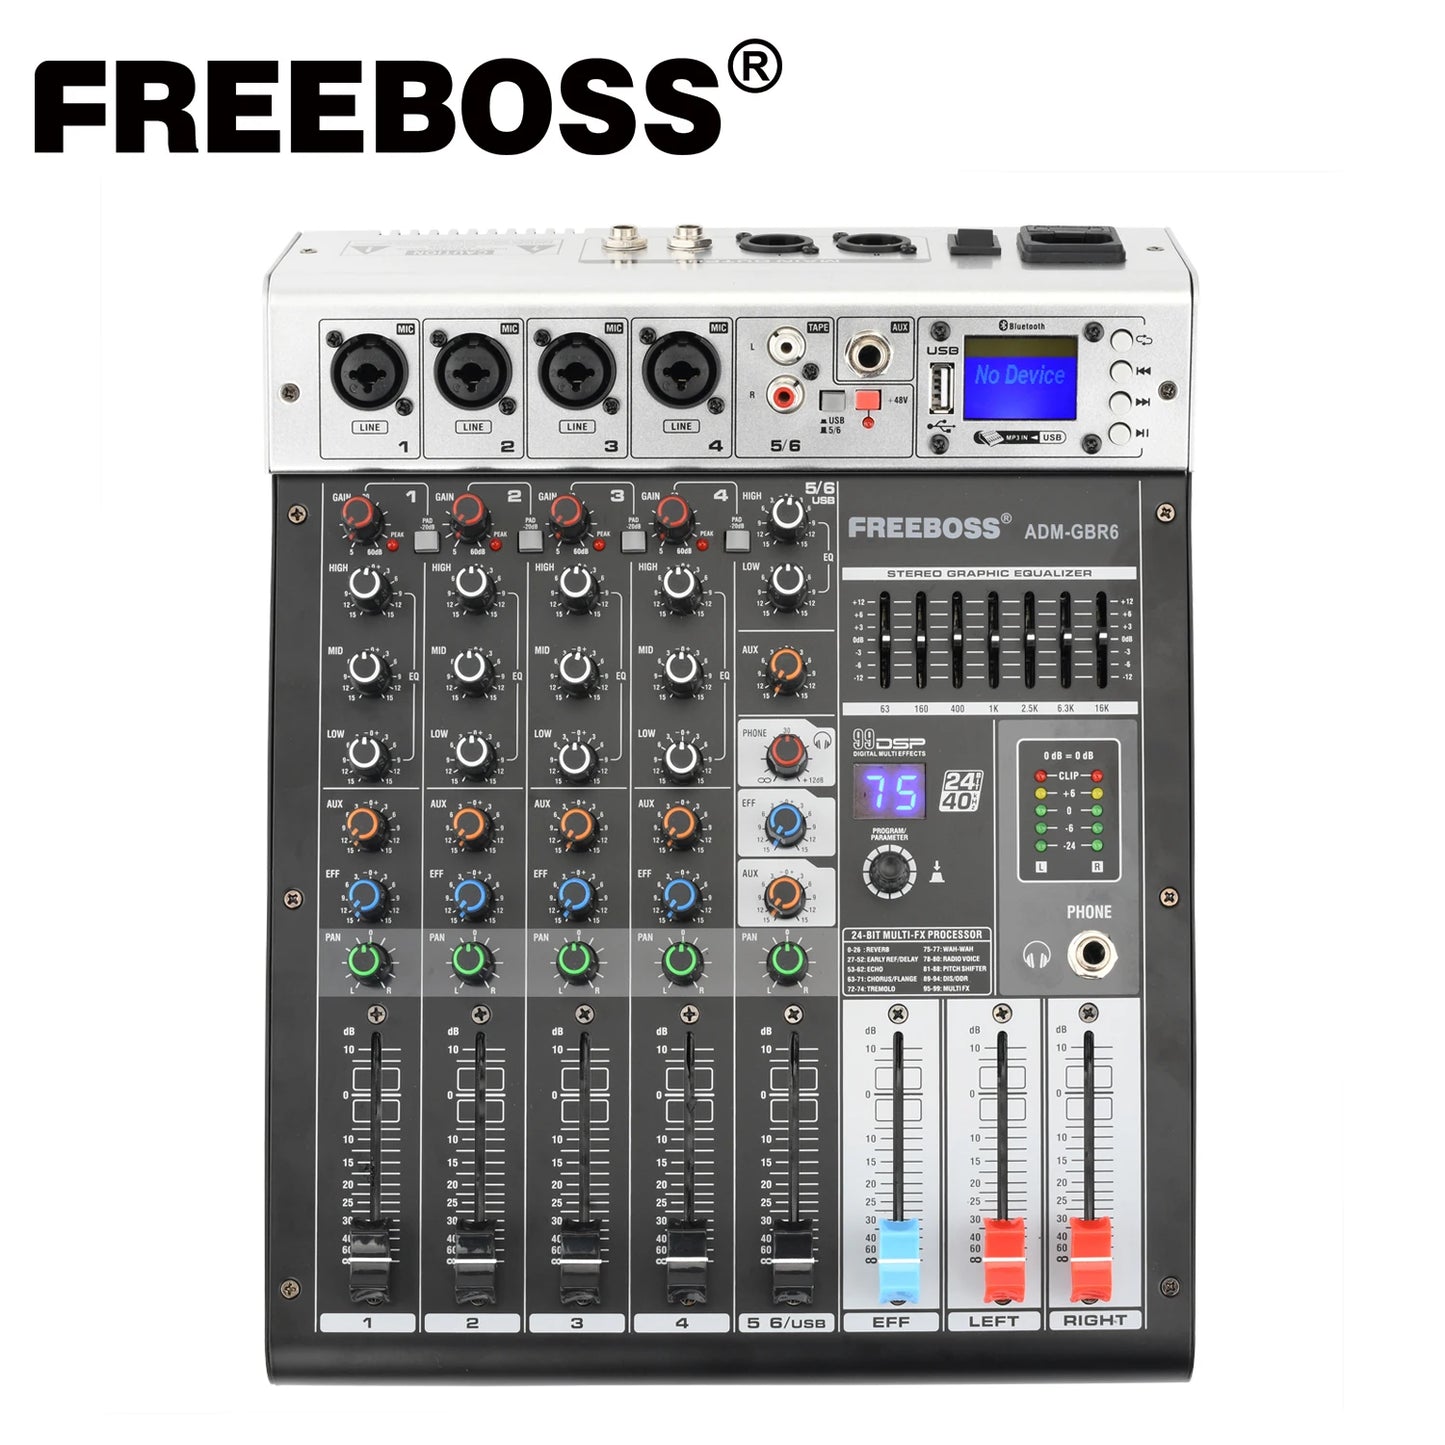
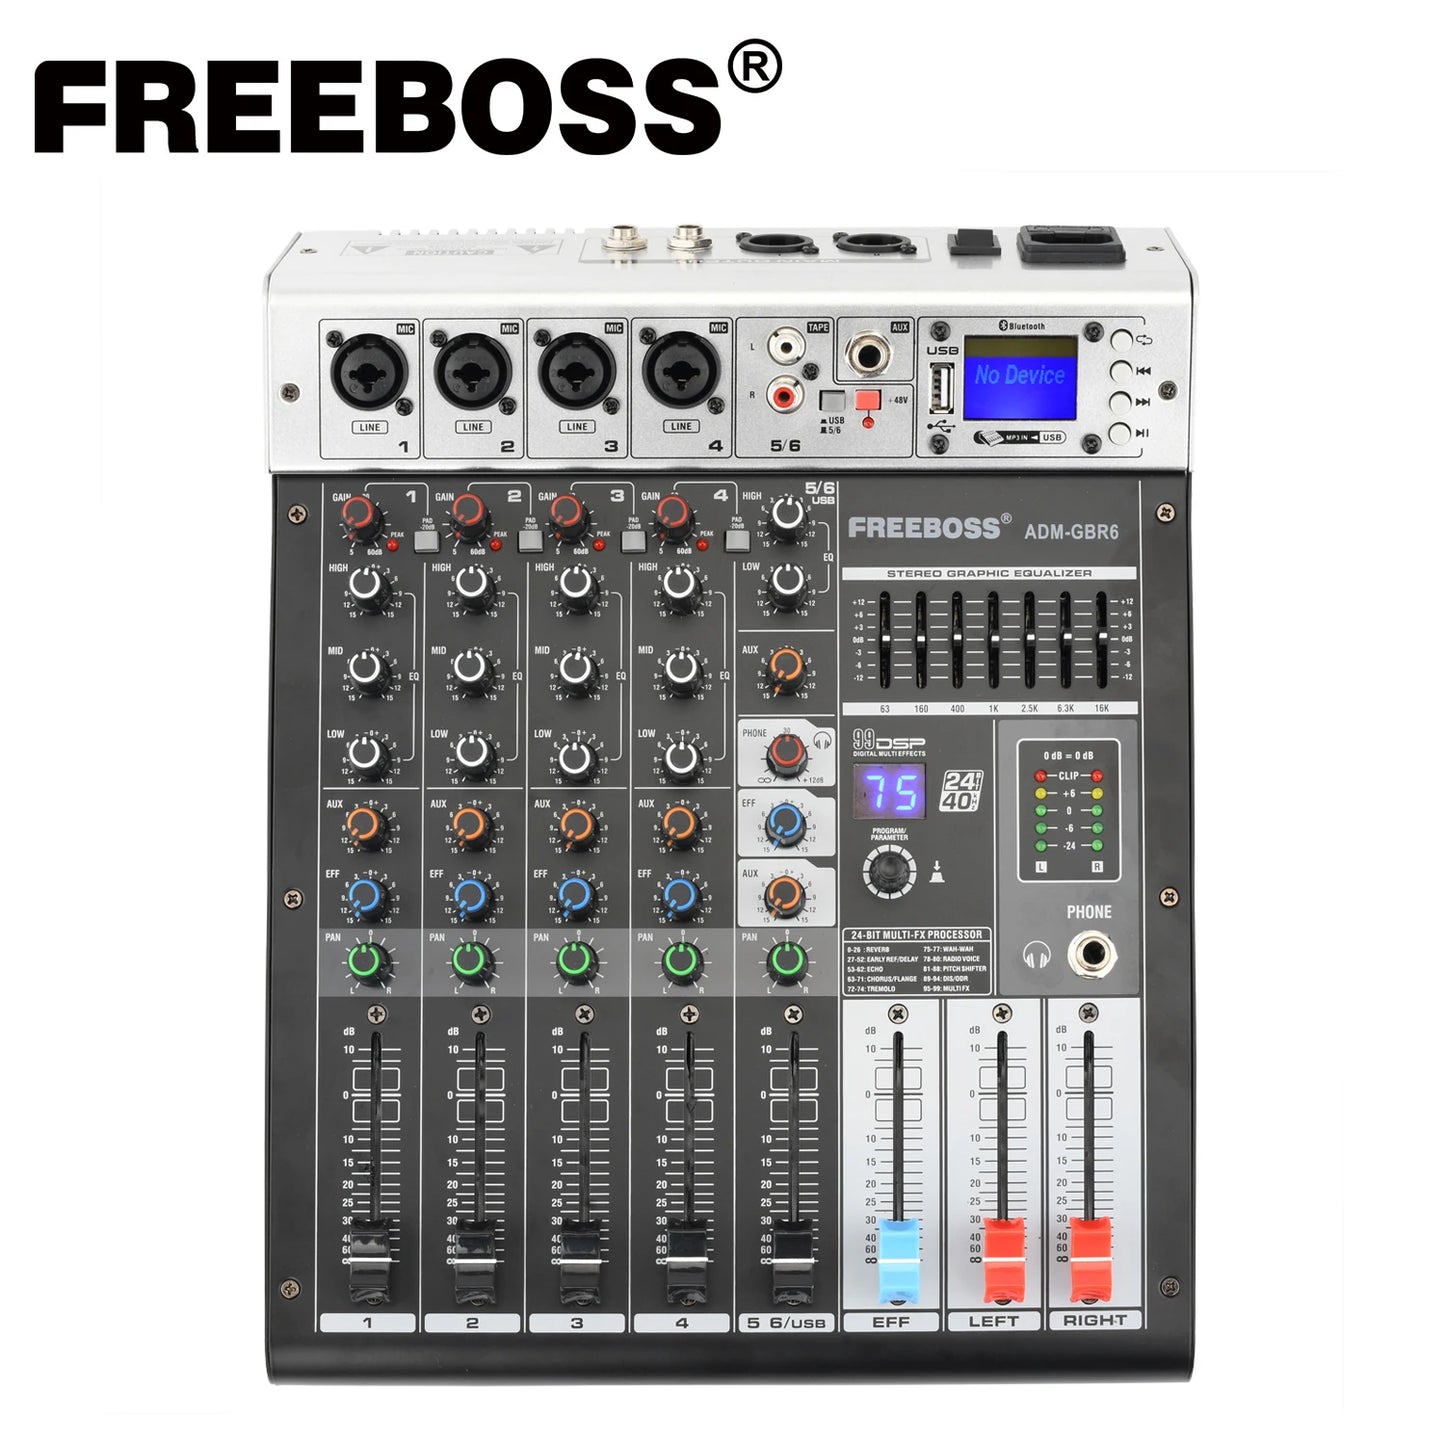
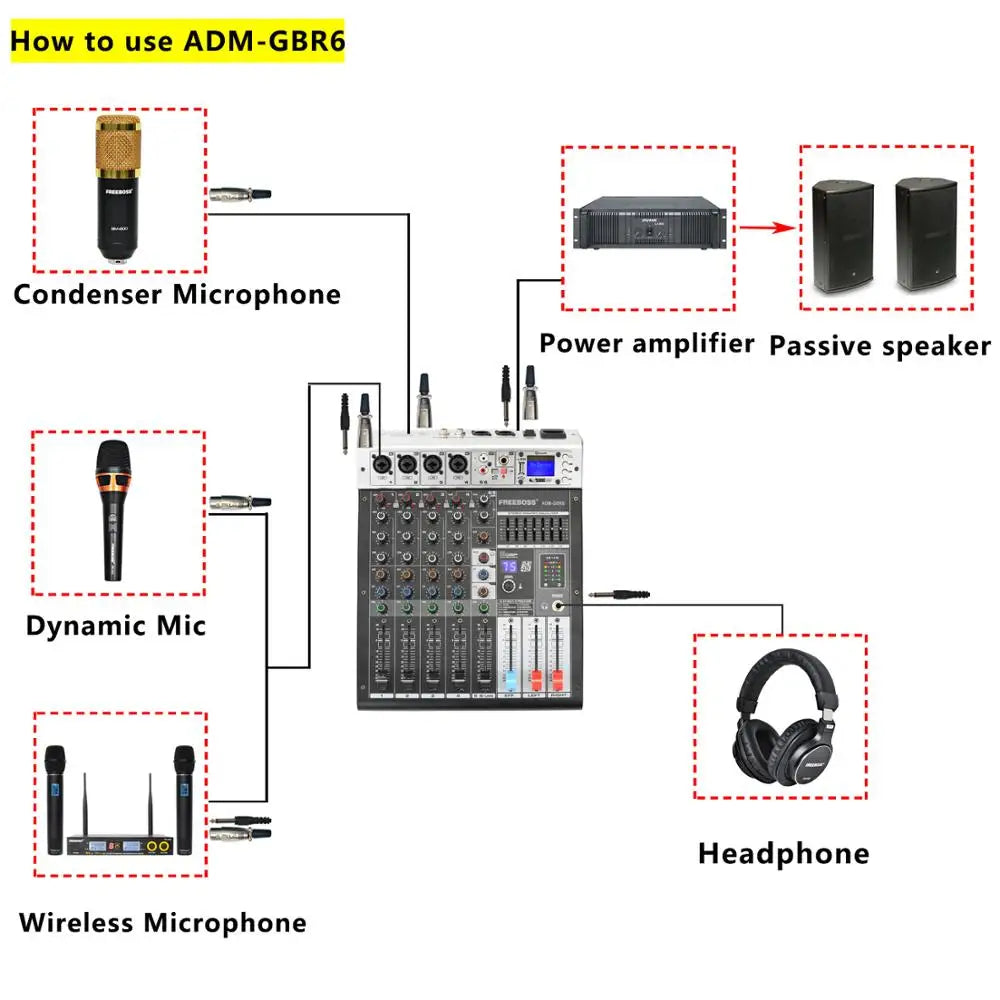
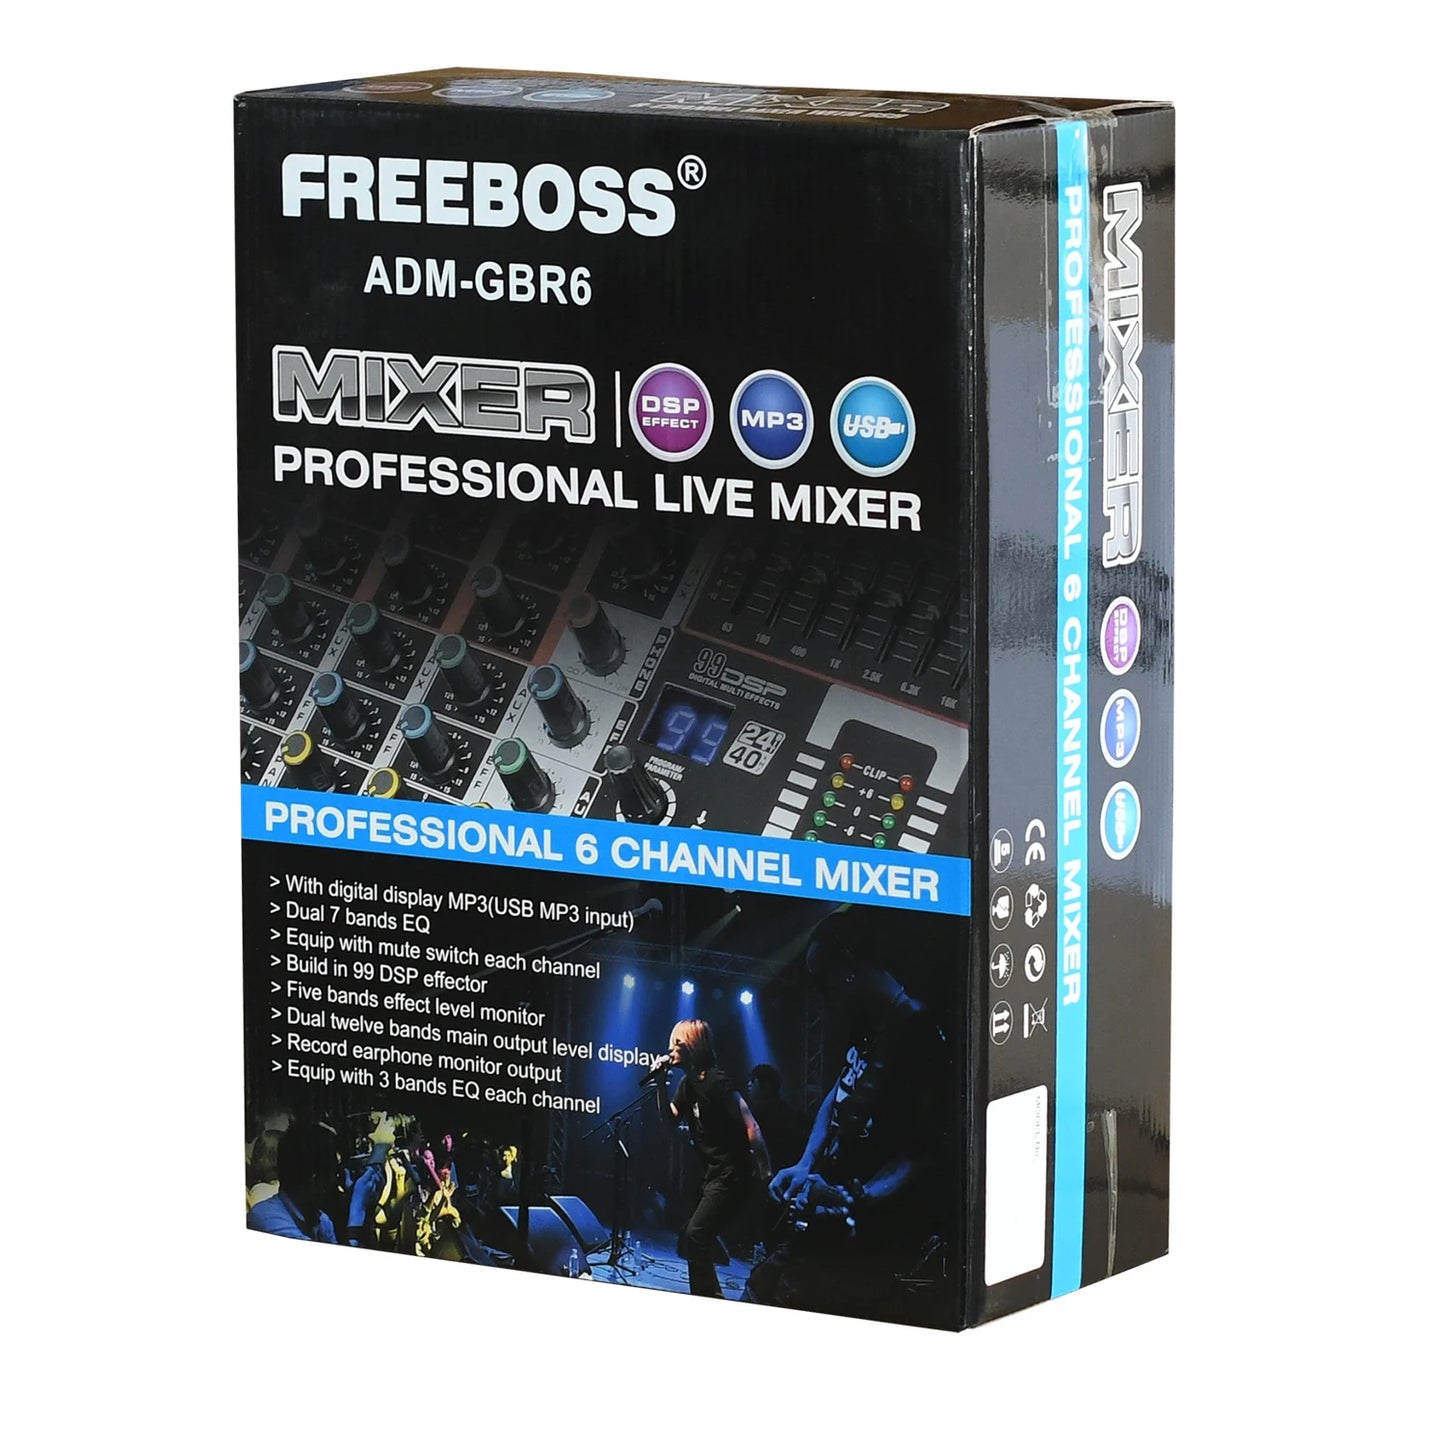
Freeboss Mixer Audio 6 Channel USB Function Bluetooth Karaoke dj Console with 48V Phantom Power audio mixer

Key Point:
1. 6 Channel input (4 Mono + 1 Stereo)
2. 3 Band Channel EQ+ 7 Band Graphic Equalizer
3. 99 DSP Effects(24 BIT Multi-Fx processor )
4. USB play, Record
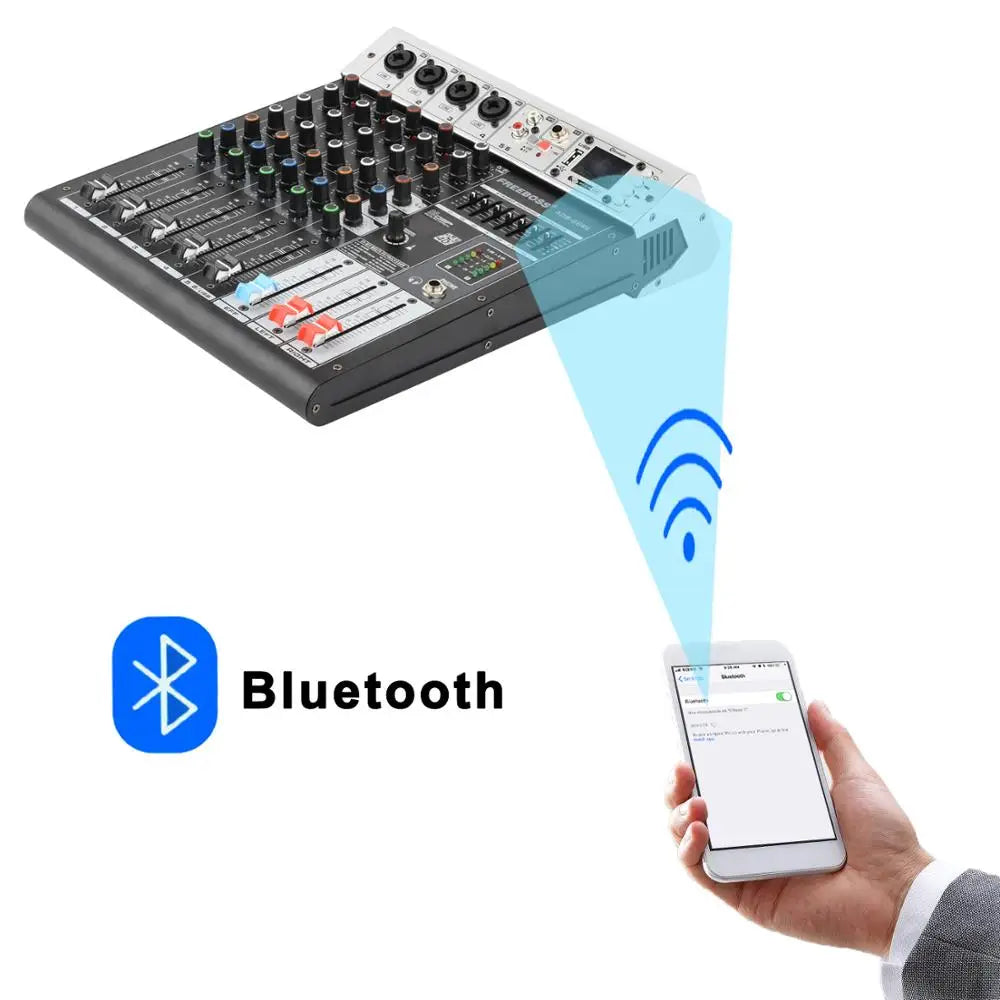
5. Bluetooth function

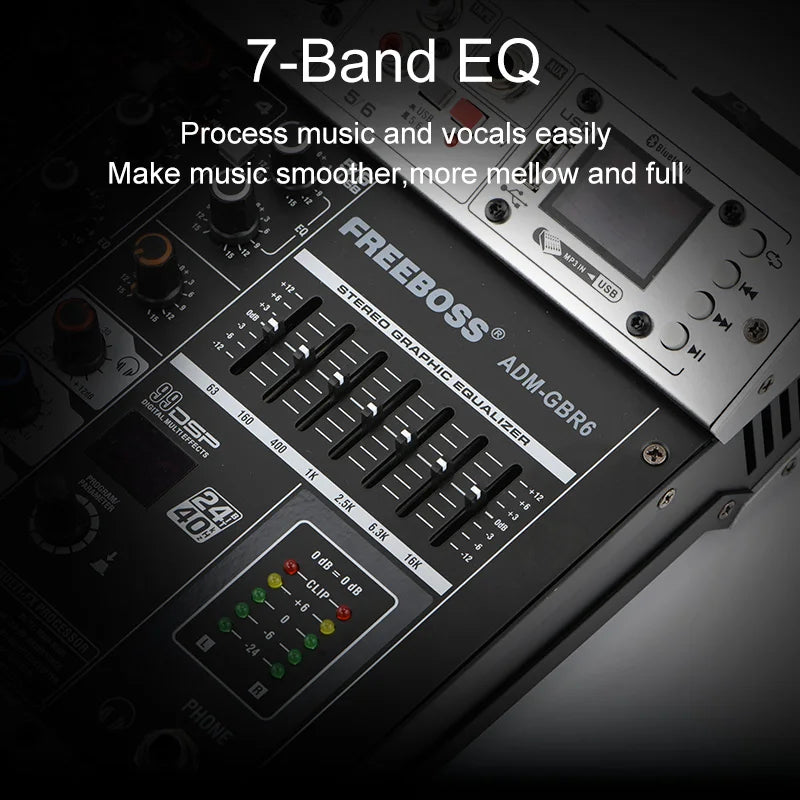
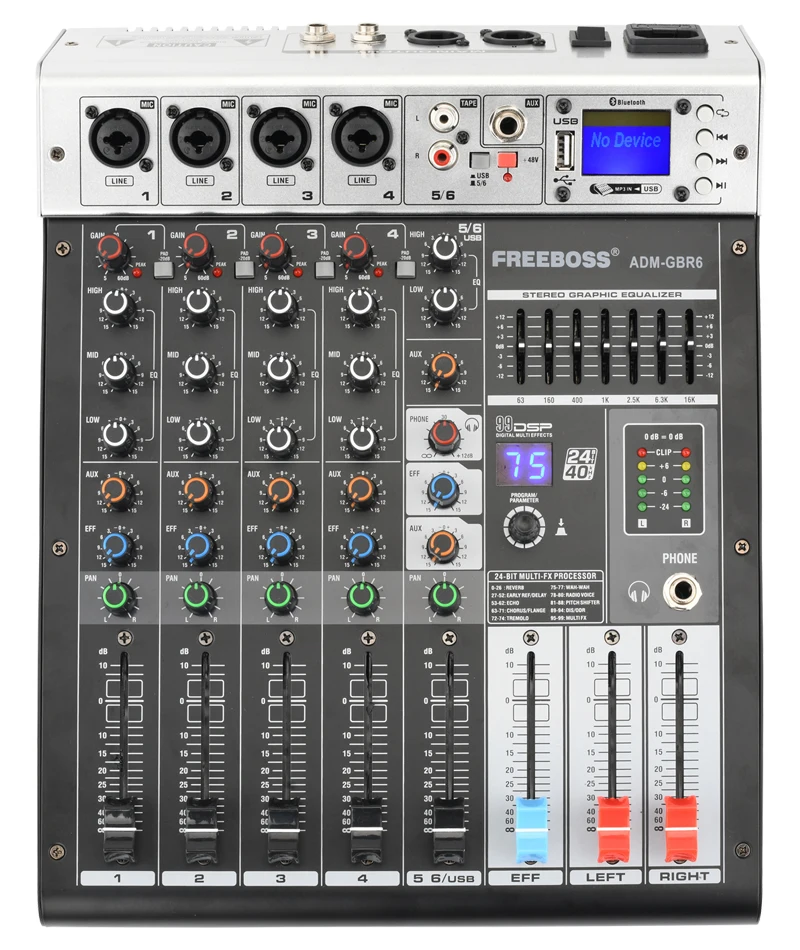
7 Bands STEREO GRAPHIC EQUALIZER
7 Bands STEREO GRAPHIC EQUALIZER provides tone adjustment to the signal that is output to the MIX 0UT. Each band of 63, 160, 400, 1k, 2.5k, 6.3k and 12kHz provides a+/-12dB boost or cut
99 DSP Effect (24BIT Multi-Fx Processor)

The effect processor was upgraded to the following version.

1) Rotate the Program knob to choose the effect you need,then press to confirm.

2) Rotate the Effect Main Input Knob to adjust the effect input volume

3) Rotate the Effect Channel Input Knob to adjust channel input volume

4) Adjust Effect Main Output Fader.

USB Function
1). USB Menu
a. Quickly press "Cycle"
b. Press Pre/ Next and Choose what you need:
Music---Bluetooth---Record---PC---System
c.Press Pause/Play into next level menu.
2) USB --Music function
Automaticly play music when insert USB sticker.
Please note:
A. Play Mode:
Repeat All
Repeat Local
Repeat One
Random
Repeat Folder
B. Built-in EQ effect:
  • Natural

  • Rock

  • Pop

  • Classic

  • Jazzy

  • Country


3) Bluetooth
a. Press "Cycle"
b. Press "Pre/ Next" to find "Bluetooth", then press "Play/Pause" to wait for pairing
c. Turn on the bluetooth function of your mobile to find “MIX-MP3 BT" and pair.
4) USB Play
a. Insert USB Stick
b. Press the button to choose USB Mode
c. Adjust Channel Fader to adjust the channel output volume
d. Adjust Main Fader to adjust the main output volume
e. Adjust Channel EQ
5) USB Stick Record
Option 1 ------ Long press"Cycle" into Record Mode.
OPtion 2 ------ a. Press"Cycle" into Menu
b. Press "Pre" or "Next" to find "Record" , then Press
"Play/Pause" into Record Mode


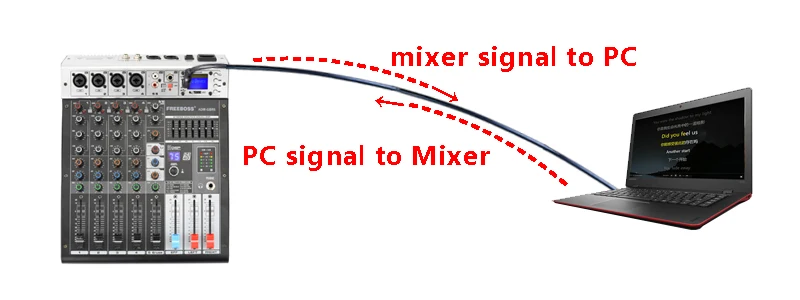
Computer Play and Record
1). Connect mixer to computer
( the USB cable is not included)


2). Computer play music
a) Open a music player (program is not included)
b) Play music
c) Push the USB fader to adjust the volume

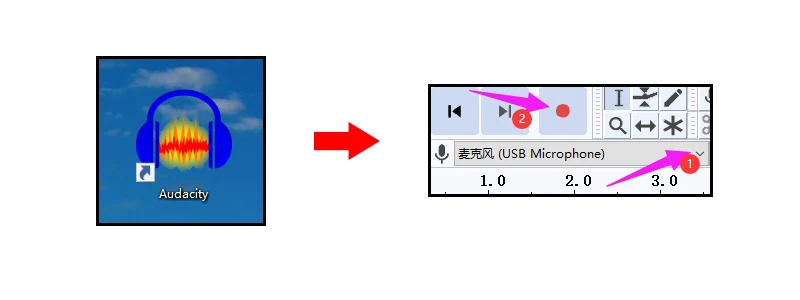
3). Computer record
a) Open your Record program ( program is not included)
b) Set your mixer as the microphone
c) Click the REC to record.

+48V Phantom Power
  • For this model, there is only one +48V phanotm power switch.

  • When you turn on the +48V phantom power, all XLR input sockets will supply the +48V phantom power.

Please note:
A) +48V Phantom Power is only for XLR plug ,not for 6.3 plug.

B) When you use Dynamic Microphone, please do not turn on the +48V Phantom, otherwise the dynamic microphone maybe burnt.
C) Once you turn on the +48V Phantom Power, all XLR input sockets will provide +48V phantom power.
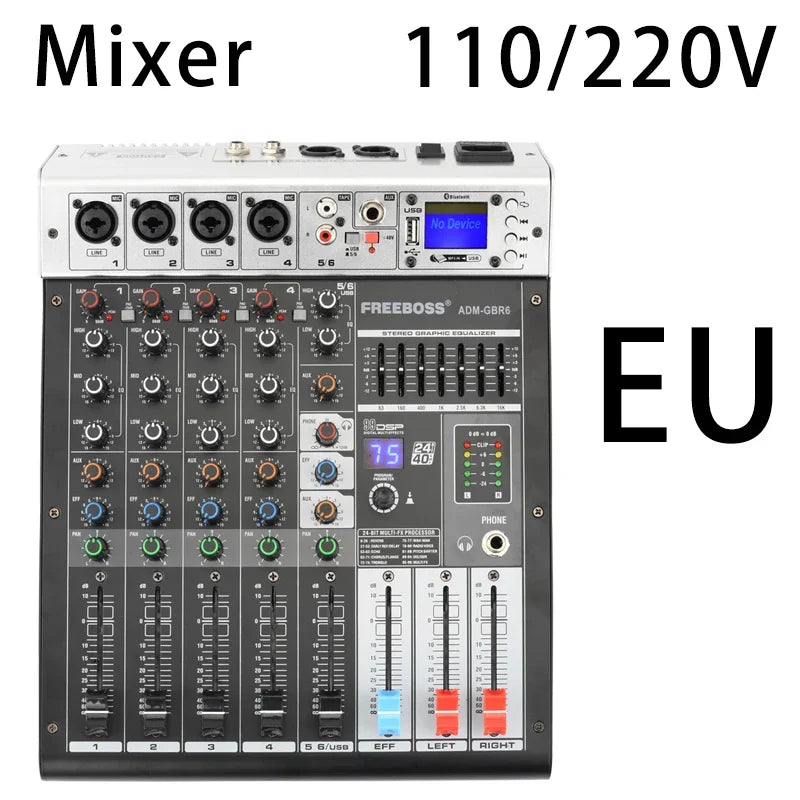
Details For ADM-GBR6 Audio Mixer
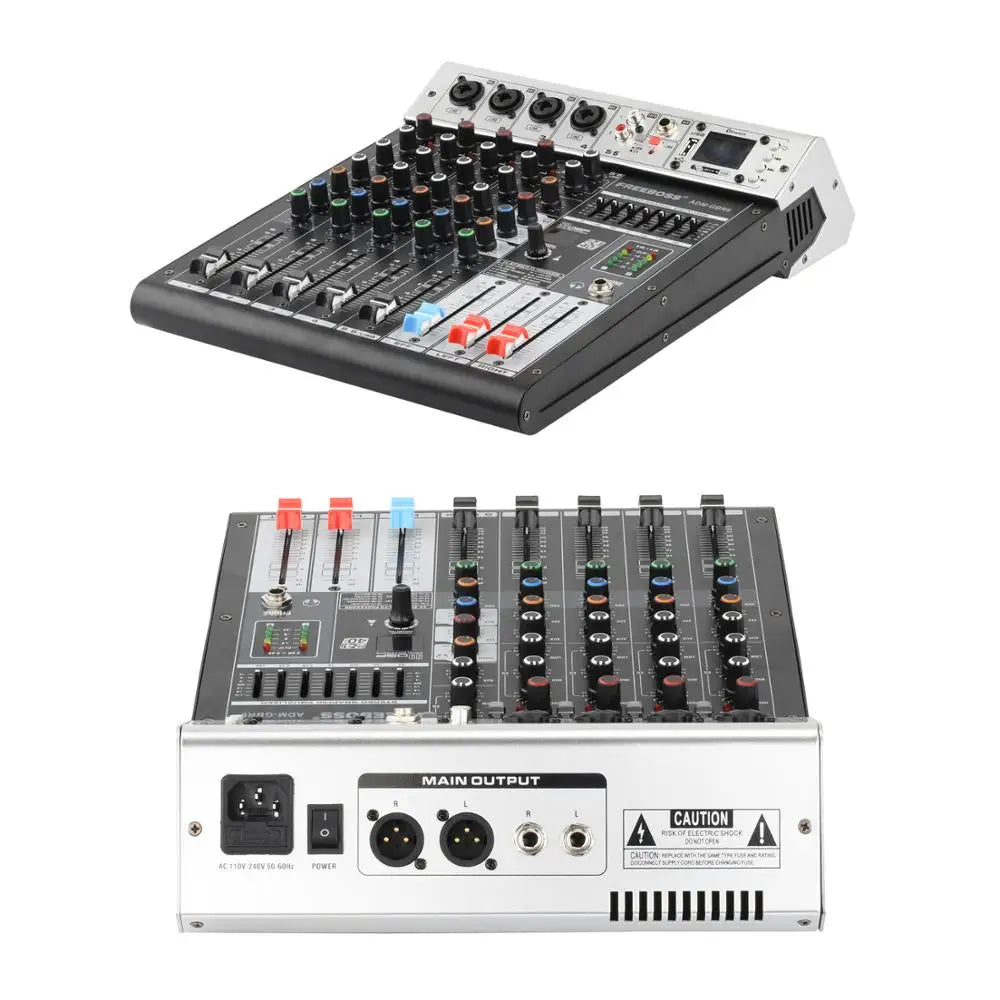
1. Fuse holder/IEC mains receptacle
1)Power supply: AC 110V-240V 50/60Hz
2) Fuse: Blown fuses must only be replaced by fuses of the sametype and rating.
3) The console is connected to the mains via the cable supplied, which meets the required safety standards. The mains connection is made via a cable with IEC mains connector. An appropriate mains cable is supplied with the equipment.
4) we supply EU Plug and US plug . If you need other plug, please tell us.
2. Power Switch
1) Use the POWER switch to turn on the mixing console.
2) The POWER switch should always be in the "Off" position when you are about to connect your unit to the mains.
3)To disconnect the unit from the mains, pull out the main cord plug. When installing the product, ensure that the plug is easily accessible.
3/4. Main out (L R Jacks )
These jacks deliver the mixer's stereo output.
You use these jacks, for example, to connect to the power ampllfier driving your main speakers.
5. Balance input Lo-MIC/Unbalance Input Hi-Line
1) They are combination socket.
2) These are to be connected with microphone XLR Jack’s are used for the balanced signal.
3)These are to be connected with these line sourcessuch as deck tuberturntable keyboard,etc.
6. Input Jacks (channel 5/6)
1) Unbalanced phone type and RCA pin type stereo line input jack.
2) These inputs are compatible with 600 ohmline level devices.
7. USB Input Switch
1) Pressed status is USB input.
2) Bounce status is Channel input.
8. AUX send
The AUX SEND jack should be used when hooking up a monitor power amp or active monitor speaker system. The relevant aux path should be set pre-fader.
9. +48V Phantom power Switch
1) Turn the phantom power on/off for all channels,
2) Turn the switch on when you are using condenser microphone. +48V DC powe r is supplied to pin 2 and pin 3 of the XLR type.
3) Phantom power is not required, make sure the switch is off.
10. +48V phantom power led indicator light
When you turn on the +48V phantom power, the led indicator light will be on. If you turn off the power, the light will be off.
11. Gain
This has a function which adjusts the input sensitivity of each channel in order toinput the constant level of the signal.
12. Peak Light
If this light is on for a long time, it means that the input signal is too large. Need to turn down the gain knob for this channel.
13. Pad Switch
Cut down the signal sensitivity of each channel 20dB


14. HIGH EQ Knob
1) This control gives you up to 15 dB boost or cut above 12K Hz, and it is flat(not boost or cut) at the detent.
2) Use it to add sizzle to cymbals, and an overall sense of transparency, or edge to keyboards, vocals, guitar and bacon frying.
3)Turn it down a little to reduce sibilance, or to hide tape hiss.
15. MID EQ Knob
1) Short for "Midrange". This knob provides 15dB of boost or cut, centered at 2.5KHz, also flat at the center detent.
2) Midrange EQ is often thought of as the frequencies that define any particular sound are almost always found in this range.
3) You can create many interesting and useful EQ changes by turning this knob down as well as up.
16. LOW EQ Knob
1) This control gives you up to 15dB boost or cut below 80Hz.
2) The circuit is flat at the center detent position.
3) This frequency represents the punch in bass drums, bass guitar, fat synth patches, and some really serious male singers.

17. AUX Control

1) Monitor and effects busses (AUX sends) source their signals via a control from one or more channels and sum these signals to a so-called bus.

2) This bus signal is sent to an aux send connector (for monitoring applications: MON OUT ) and then routed, for example, to an active monitor speaker or external effects device.

3) In the latter case, the effects return can then be brought back into the console via the aux return connectors.

4) All monitor and effects busses are mono, are tapped into post EQ and offer amplification of up to +15 dB.

18. Effect Knob
When you want to get echo effect of each channel, you can adjust the level of installed echo by this (Unless you will use echo on any channel, turn to 'O' position of MON control at that channel.)
19. PAN Control
1) The PAN control determines the position of the channel signal within the stereo image.
2) When working with subgroups. you can use the PAN control to assign the signal to just one output, which gives you additional flexibility in recording situations.
3) For example, when routing to subgroups 3 and4 , panning hard left will route the signal to group output 3 only, and panning hard right will route to group output 4 only.
Channel Fader:
These faders are used for adjusting the volume of signal sources, which are connected to the relevant channels.

20. PHONES Volume Knob
This controls the volume of the headphones output from off to maximum gain.
21. FX Control
1) The AUX SEND (FX) jack carries the master aux mix (from The channel's FX controls).
2) You can connect this to an external effects device to process the FX bus.
3) The processed signal can then be brorght from the effects device back into the STEREO AUX RETURN jacks.
22. AUX Control
1) Monitor and effects busses (AUX sends) source their signals via a control from one or more channels and sum these signals to a so-called bus.
2) This bus signal is sent to an aux send connector (for monit oring applications: MON out ) and then routed,for example, to an active monitor speaker or external effects device.
3) In the lattercase, the effects return can the n be brought back into the console via the auxreturn connectors.
4) All monitor and effects busses are mono, are tapped into postEQ and offer amplification of up to +15 dB.
23. Effector Display
Show the kind of effector.
24. Program/parameter Knob
To choose the effect you need.
25. Effect Fader
Use this fader to gently adjust the level of the stereo output from the internal FX processor being added to the main mix.
26. Master Volume (L/R)
This is used for adjusting volume of finally mixed out puts (L&R) and sending the relevant signals to input channel of main amplifier.
27. Level meter
This is a lamp which indicates output levels of left and right channel and operating conditions of the appliance, thus you can see all output conditions with your eyes, Make sure the output levels should not exceed the LED indicator.
28. Phones Jack
Stereo phone type output jack for connecting a set of handphones (nominal output/impedance of 3mW 40 ohms. This signal can be selected with the PFL Switch fromthe stereo signals of the STEREO bus of signal channel signal of the PFL bus.Its signal level can be controlled with PHONES knob. It can also be connect-ed witha monitor system with a nominal output/impedance of +4dB/10k).
Packing List:
1x Mixer
1x Power cable
1x User manual
1x Carton box


View full details